基于spring boot的博客开发 学习一下当前web开发中比较火的spring boot,直接就实战开发了,从开发中慢慢学习。
个人觉得这个课程是初步了解中最好的,详细,并且有解释,还有配套资源。https://www.bilibili.com/video/BV1KJ411R7XL?spm_id_from=333.999.0.0&vd_source=b7500783c2d0db35836200a2d00d0489
写完了后,感觉还是学到不少东西,了解了一些springboot的知识,一个网站的搭建,如何接收前端传的数据,如何处理,如何从数据库中提取数据,如何返回数据给前端,但是更多还是一个初步的了解吧,更多的详细点肯定是需要系统的学习的。
写完了也上传到了github:https://github.com/The-Itach1/Springboot-blog
前端开发 由于个人不关注与前端,所以,直接用现成的。
后端开发 构建框架 先下载破解版,https://www.cnblogs.com/technicist/p/15229615.html
创建项目,发现没有Spring Initializr,去搜索这个插件然后下载就行。
然后跟着视频操作就行,添加下面的模块。
web
Thymeleaf
JPA
MySQL
Aspects
DevTools
然后发现我的IDEA没有core,然后添加下面的模块
Thymeleaf
JPA
MySQL
Spring Web
Spring Boot DevTools
Lombok
配置Thymeleaf的版本,在pom.xml中添加
<thymeleaf.version>3.0.2.RELEASE</thymeleaf.version>
<thymeleaf-layout-dialect.version>2.1.1</thymeleaf-layout-dialect.version>配置thymeleaf模块,mysql,jpa(方便数据操作的东西),以及使用navicat创建一个blog数据库,navicat破解版:https://www.cnblogs.com/hhaostudy/p/15898030.html
spring:
  thymeleaf:
    mode: HTML
  datasource:
    driver-class-name: com.mysql.jdbc.Driver
    url: jdbc:mysql://localhost:3306/myblog?useUnicode=true&characterEncoding=utf-8&useSSL=false&serverTimezone=UTC
    username: root
    password: 123456
  jpa:
    hibernate:
      ddl-auto: update
    show-sql: true #将数据库的一些信息可以输出在日志和控制台中。
配置日志,日志级别,日志路径,都是spring默认的。
logging:
  level:
    root: info
    com.The_Itach1: debug #给自己的包一个日志级别
  file:
    name: log/blog.log #日志位置,默认按10m划分
然后可以自己去设置日志的相关内容,resources文件夹下创建logback-spring.xml,就是可以重写springboot集成的logback相关的一些配置。
1
2
3
4
5
6
7
8
9
10
11
12
13
14
15
16
17
18
19
20
21
22
23
24
25
26
27
28
29
30
31
32
33
34
35
36
37
38
39
40
<?xml version="1.0" encoding="UTF-8" ?> <configuration > <include resource ="org/springframework/boot/logging/logback/defaults.xml" /> <property name ="LOG_FILE" value ="${LOG_FILE:-${LOG_PATH:-${LOG_TEMP:-${java.io.tmpdir:-/tmp}}}/spring.log}" /> <include resource ="org/springframework/boot/logging/logback/console-appender.xml" /> <appender name ="TIME_FILE" class ="ch.qos.logback.core.rolling.RollingFileAppender" > <encoder > <pattern > ${FILE_LOG_PATTERN}</pattern > </encoder > <file > ${LOG_FILE}</file > <rollingPolicy class ="ch.qos.logback.core.rolling.TimeBasedRollingPolicy" > <fileNamePattern > ${LOG_FILE}.%d{yyyy-MM-dd}.%i</fileNamePattern > <maxHistory > 30</maxHistory > <timeBasedFileNamingAndTriggeringPolicy class ="ch.qos.logback.core.rolling.SizeAndTimeBasedFNATP" > <maxFileSize > 10MB</maxFileSize > </timeBasedFileNamingAndTriggeringPolicy > </rollingPolicy > </appender > <root level ="INFO" > <appender-ref ref ="CONSOLE" /> <appender-ref ref ="TIME_FILE" /> </root > </configuration >
开发环境,dev,生成环境,pro,复制两个配置文件就可以了,主要是生成和开发需要的一些配置不一样。
最后需要注意的是springboot版本在2.0以上,应配置为driver‐class‐name: com.mysql.cj.jdbc.Driver,并且你的mysql得打开。
异常处理 配置页面 错误页面,404错误,500错误,error错误页面。
先创建一个index.html,放在templates下。
将错误页面放在resources/tempplates中,动态的,创建html文件就行。
然后需要测试下,在com.the_itach1下,新建web软件包,在里面定义一个控制器类,作用就是如果以get方式访问根路径,会跳转到index.html
1
2
3
4
5
6
7
8
9
10
11
12
13
14
15
16
17
18
package com.the_itach1.web;import org.springframework.stereotype.Controller;import org.springframework.web.bind.annotation.GetMapping;@Controller public class IndexController @GetMapping("/") public String index () int i=9 /0 ; return "index.html" ; } }
然后发现了问题,就是访问不到resources目录下的文件,造成的原因,spring boot的版本高了,解决方法,降低版本或者,在yml配置中添加下面的语句。
spring:
  web:
    resources:
      static-locations: classpath:/templates/,classpath:/static/
然后运行开始测试。
全局异常处理 自定义错误异常处理,在代码出问题的时候,返回到自己的错误页面,并显示一些错误信息。
我们需要创建一个在com.The_Itach1文件夹下面新建hander包,创建ControllerExceptionHandler错误页面拦截器,通过定义这个类来拦截所有的异常。
1
2
3
4
5
6
7
8
9
10
11
12
13
14
15
16
17
18
19
20
21
22
23
24
25
26
27
28
29
30
31
32
33
34
35
36
37
package com.the_itach1.handler;import org.slf4j.Logger;import org.slf4j.LoggerFactory;import org.springframework.web.bind.annotation.ControllerAdvice;import org.springframework.web.bind.annotation.ExceptionHandler;import org.springframework.web.servlet.ModelAndView;import javax.servlet.http.HttpServletRequest;@ControllerAdvice public class ControllerExceptionHandler private final Logger logger= LoggerFactory.getLogger(this .getClass()); @ExceptionHandler(Exception.class) public ModelAndView exceptionHander (HttpServletRequest request,Exception e) { logger.error("Requst URL : {}, Exception : {}" ,request.getRequestURI(),e); ModelAndView mv=new ModelAndView(); mv.addObject("url" ,request.getRequestURI()); mv.addObject("excption" ,e); mv.setViewName("error/error.html" ); return mv; } }
然后这样还不够,还想要在页面也能显示我们的详细错误,我们就可以直接在页面查看错误信息,就不用在服务器中查看日志了,这我们就必须修改对应的html代码了。
error.html,添加下面代码
1 2 3 4 5 6 7 8 9 10 <div > <div th:utext ="'< !--'" th:remove ="tag" > </div > <div th:utext ="'Failed Request URL : ' + ${url}" th:remove ="tag" > </div > <div th:utext ="'Exception message : ' + ${exception.message}" th:remove ="tag" > </div > <ul th:remove ="tag" > <li th:each ="st : ${exception.stackTrace}" th:remove ="tag" > <span th:utext ="${st}" th:remove ="tag" > </span > </li > </ul > <div th:utext ="'--> '" th:remove ="tag" > </div > </div >
然后发现好像不行,还不知道怎么回事
资源找不到异常 自己定义一个异常类,例如如果找不到想要的资源,跳到自己的异常类进行处理,然后响应。
MyNotFoundException类。
1
2
3
4
5
6
7
8
9
10
11
12
13
14
15
16
17
18
19
20
21
22
23
24
25
package com.the_itach1;import org.springframework.http.HttpStatus;import org.springframework.web.bind.annotation.ResponseStatus;@ResponseStatus(HttpStatus.NOT_FOUND) public class MyNotFoundException extends RuntimeException public MyNotFoundException () super (); } public MyNotFoundException (String message) super (message); } public MyNotFoundException (String message, Throwable cause) super (message, cause); } }
为了测试,然后在控制器,IndexController中抛出这个异常。
1
2
3
4
5
6
7
8
9
10
11
12
13
14
15
16
17
@Controller public class IndexController @GetMapping("/") public String index () String blog=null ; if (blog==null ) { throw new MyNotFoundException("博客不存在" ); } return "index.html" ; } }
这时候实际上还不行,因为我们之前创建了一个错误页面拦截的ControllerExceptionHandler类,会将异常都拦截下来,所以我们需要进行一些判断处理了,对于这些带状态码的异常,我们将其抛给springboot自己处理。
在ControllerExceptionHandler中添加。
1 2 3 4 5 if (AnnotationUtils.findAnnotation(e.getClass(), ResponseStatus.class) != null ) { throw e; }
日志处理 要记录日志内容 使用spring的aop,具体说是什么切断数据流,创造切面。
要记录的日志
请求 url
访问者 ip
调用方法 classMethod
参数 args
返回内容
日志类 创建一个软件包,创建日志类
1
2
3
4
5
6
7
8
9
10
11
12
13
14
15
16
17
18
19
20
21
22
23
24
25
26
27
28
29
30
31
32
33
34
35
36
37
38
39
40
41
42
package com.the_itach1.aspect;import org.aspectj.lang.annotation.*;import org.slf4j.Logger;import org.slf4j.LoggerFactory;import org.springframework.stereotype.Component;@Aspect @Component public class LogAspect private final Logger logger= LoggerFactory.getLogger(this .getClass()); @Pointcut("execution(* com.the_itach1.web.*.*(..))") public void log () } @Before("log()") public void doBefore () { logger.info("-----------doBefore------------" ); } @After("log()") public void doAfter () { logger.info("-----------doAfter-------------" ); } @AfterReturning(returning = "result",pointcut = "log()") public void doAfterReturn (Object result) { logger.info("Result : {}" , result); } }
然后修改下web控制器,里面的代码。
1
2
3
4
5
6
7
8
9
10
11
12
13
14
15
16
17
18
19
package com.the_itach1.web;import com.the_itach1.MyNotFoundException;import org.springframework.stereotype.Controller;import org.springframework.web.bind.annotation.GetMapping;import org.springframework.web.bind.annotation.PathVariable;@Controller public class IndexController @GetMapping("/{id}/{name}") public String index (@PathVariable Integer id ,@PathVariable String name) System.out.println("---------index---------" ); return "../index.html" ; } }
这里我是将return 改为了../index.html 运行,要不然找不到首页,会报错,可以看到这些日志打印的顺序。
接下来添加代码,记录我们想要的url,ip,方法,返回值等。
1
2
3
4
5
6
7
8
9
10
11
12
13
14
15
16
17
18
19
20
21
22
23
24
25
26
27
28
29
30
31
32
33
34
35
36
37
38
39
40
41
42
43
44
45
46
47
48
49
50
51
52
53
54
55
56
57
58
59
60
61
62
63
64
65
66
67
68
69
70
71
72
73
74
75
76
77
78
79
80
81
82
83
84
85
86
87
88
89
90
91
92
93
package com.the_itach1.aspect;import org.aspectj.lang.JoinPoint;import org.aspectj.lang.annotation.*;import org.slf4j.Logger;import org.slf4j.LoggerFactory;import org.springframework.stereotype.Component;import org.springframework.web.context.request.RequestContextHolder;import org.springframework.web.context.request.ServletRequestAttributes;import javax.servlet.http.HttpServletRequest;import java.util.Arrays;@Aspect @Component public class LogAspect private final Logger logger= LoggerFactory.getLogger(this .getClass()); @Pointcut("execution(* com.the_itach1.web.*.*(..))") public void log () } @Before("log()") public void doBefore (JoinPoint joinPoint) { ServletRequestAttributes attributes= (ServletRequestAttributes) RequestContextHolder.getRequestAttributes(); HttpServletRequest request=attributes.getRequest(); String url=request.getRequestURI(); String ip=request.getRemoteAddr(); String classMethod= joinPoint.getSignature().getDeclaringTypeName()+ "." + joinPoint.getSignature().getName(); Object[] args=joinPoint.getArgs(); Requestlog requestlog=new Requestlog(url,ip,classMethod,args); logger.info("Request : {}" ,requestlog); } @After("log()") public void doAfter () { } @AfterReturning(returning = "result",pointcut = "log()") public void doAfterReturn (Object result) { logger.info("Result : {}" , result); } private class Requestlog private String url; private String ip; private String classMethod; private Object[] args; public Requestlog (String url, String ip, String classMethod, Object[] args) this .url = url; this .ip = ip; this .classMethod = classMethod; this .args = args; } @Override public String toString () return "Requestlog{" + "url='" + url + '\'' + ", ip='" + ip + '\'' + ", classMethod='" + classMethod + '\'' + ", args=" + Arrays.toString(args) + '}' ; } } } 2022 -07 -06 17 :57 :42.848 INFO 6316 --- [nio-4000 -exec-1 ] com.the_itach1.aspect.LogAspect : Request : Requestlog{url='/11/aaa' , ip='0:0:0:0:0:0:0:1' , classMethod='com.the_itach1.web.IndexController.index' , args=[11 , aaa]}---------index--------- 2022 -07 -06 17 :57 :42.856 INFO 6316 --- [nio-4000 -exec-1 ] com.the_itach1.aspect.LogAspect : Result : ../index.html
页面处理 这部分主要是将之前编写好的前端页面,添加进这个项目中。
弄得满足格式后,直接复制进来。
然后运行后,访问index,发现图片和自己的css都加载不进来,在application.yml下添加下面语句,并且好像不需要去添加th:href,不知道是不是因为我将thymeleaf版本升高了的原因。
  mvc:
    static-path-pattern: /static/**
然后就ok了,但是之前的error.html还是因为thymeleaf的原因无法成功,虽然已经换了版本,但是还是不行,不行就算了。
实际类构建 这一部分就是创建一些类,博客类,评论类,标签类,文章类型类,用户类,我们需要明确这些类的成员,以及互相的关系(一对多,多对一,多对多),并且在数据库中生成相应的表结构,直接就在代码中体现了。
然后维护和被维护,实际上就是外键,比如说blog对于Type,blog是维护的一方,Type就是被维护的一方,t_blog就含有外键type_id。
下面是教程中的一张图,可以方便理解关系。
创建po软件包,在里面创建我们需要的类。
Blog类
1
2
3
4
5
6
7
8
9
10
11
12
13
14
15
16
17
18
19
20
21
22
23
24
25
26
27
28
29
30
31
32
33
34
35
36
37
38
39
40
41
42
43
44
45
46
47
48
49
50
51
52
53
54
55
56
57
58
59
60
61
62
63
64
65
66
67
68
69
70
71
72
73
74
75
76
77
78
79
80
81
82
83
84
85
86
87
88
89
90
91
92
93
94
95
96
97
98
99
100
101
102
103
104
105
106
107
108
109
110
111
112
113
114
115
116
117
118
119
120
121
122
123
124
125
126
127
128
129
130
131
132
133
134
135
136
137
138
139
140
141
142
143
144
145
146
147
148
149
150
151
152
153
154
155
156
157
158
159
160
161
162
163
164
165
166
167
168
169
170
171
172
173
174
175
176
177
178
179
180
181
182
183
184
185
186
187
188
189
190
191
192
193
194
195
196
197
198
199
200
201
202
203
204
205
206
207
208
209
210
package com.the_itach1.po;import javax.persistence.*;import java.util.ArrayList;import java.util.Date;import java.util.List;@Entity @Table(name = "t_blog") public class Blog @Id @GeneratedValue private Long id; private String title; private String content; private String firstPicture; private String flag; private Integer views; private boolean appreciation; private boolean shareStatement; private boolean commentabled; private boolean published; private boolean recommend; @Temporal(TemporalType.TIMESTAMP) private Date creatTime; @Temporal(TemporalType.TIMESTAMP) private Date updateTime; @ManyToOne private Type type; @ManyToMany(cascade = {CascadeType.PERSIST}) private List<Tag> tags= new ArrayList<>(); @ManyToOne private User user; @OneToMany(mappedBy = "blog") private List<Comment> comments=new ArrayList<>(); public Blog () } public void setId (Long id) this .id = id; } public void setTitle (String title) this .title = title; } public void setContent (String content) this .content = content; } public void setFirstPicture (String firstPicture) this .firstPicture = firstPicture; } public void setFlag (String flag) this .flag = flag; } public void setViews (Integer views) this .views = views; } public void setAppreciation (boolean appreciation) this .appreciation = appreciation; } public void setShareStatement (boolean shareStatement) this .shareStatement = shareStatement; } public void setCommentabled (boolean commentabled) this .commentabled = commentabled; } public void setPublished (boolean published) this .published = published; } public void setRecommend (boolean recommend) this .recommend = recommend; } public void setCreatTime (Date creatTime) this .creatTime = creatTime; } public void setUpdateTime (Date updateTime) this .updateTime = updateTime; } public Long getId () return id; } public String getTitle () return title; } public String getContent () return content; } public String getFirstPicture () return firstPicture; } public String getFlag () return flag; } public Integer getViews () return views; } public boolean isAppreciation () return appreciation; } public boolean isShareStatement () return shareStatement; } public boolean isCommentabled () return commentabled; } public boolean isPublished () return published; } public boolean isRecommend () return recommend; } public Date getCreatTime () return creatTime; } public Date getUpdateTime () return updateTime; } public Type getType () return type; } public void setType (Type type) this .type = type; } public List<Tag> getTags () return tags; } public void setTags (List<Tag> tags) this .tags = tags; } public User getUser () return user; } public void setUser (User user) this .user = user; } public List<Comment> getComments () return comments; } public void setComments (List<Comment> comments) this .comments = comments; } @Override public String toString () return "Blog{" + "id=" + id + ", title='" + title + '\'' + ", content='" + content + '\'' + ", firstPicture='" + firstPicture + '\'' + ", flag='" + flag + '\'' + ", views=" + views + ", appreciation=" + appreciation + ", shareStatement=" + shareStatement + ", commentabled=" + commentabled + ", published=" + published + ", recommend=" + recommend + ", creatTime=" + creatTime + ", updateTime=" + updateTime + '}' ; } }
Type类
1
2
3
4
5
6
7
8
9
10
11
12
13
14
15
16
17
18
19
20
21
22
23
24
25
26
27
28
29
30
31
32
33
34
35
36
37
38
39
40
41
42
43
44
45
46
47
48
49
50
51
52
53
54
55
56
package com.the_itach1.po;import javax.persistence.*;import java.util.ArrayList;import java.util.List;@Entity @Table(name = "t_type") public class Type @Id @GeneratedValue private Long id; private String name; @OneToMany(mappedBy = "type") private List<Blog> blogs=new ArrayList<>(); public Type () } public Long getId () return id; } public void setId (Long id) this .id = id; } public String getName () return name; } public void setName (String name) this .name = name; } public List<Blog> getBlogs () return blogs; } public void setBlogs (List<Blog> blogs) this .blogs = blogs; } @Override public String toString () return "Type{" + "id=" + id + ", name='" + name + '\'' + '}' ; } }
Tag类
1
2
3
4
5
6
7
8
9
10
11
12
13
14
15
16
17
18
19
20
21
22
23
24
25
26
27
28
29
30
31
32
33
34
35
36
37
38
39
40
41
42
43
44
45
46
47
48
49
50
51
52
53
54
55
56
57
package com.the_itach1.po;import javax.persistence.*;import java.util.ArrayList;import java.util.List;@Entity @Table(name = "t_tag") public class Tag @Id @GeneratedValue private Long id; private String name; @ManyToMany(mappedBy = "tags") private List<Blog> Blogs=new ArrayList<>(); public Tag () } public Long getId () return id; } public void setId (Long id) this .id = id; } public String getName () return name; } public void setName (String name) this .name = name; } public List<Blog> getBlogs () return Blogs; } public void setBlogs (List<Blog> blogs) Blogs = blogs; } @Override public String toString () return "Tag{" + "id=" + id + ", name='" + name + '\'' + '}' ; } }
User类
1
2
3
4
5
6
7
8
9
10
11
12
13
14
15
16
17
18
19
20
21
22
23
24
25
26
27
28
29
30
31
32
33
34
35
36
37
38
39
40
41
42
43
44
45
46
47
48
49
50
51
52
53
54
55
56
57
58
59
60
61
62
63
64
65
66
67
68
69
70
71
72
73
74
75
76
77
78
79
80
81
82
83
84
85
86
87
88
89
90
91
92
93
94
95
96
97
98
99
100
101
102
103
104
105
106
107
108
109
110
111
112
113
114
115
116
117
118
119
120
121
122
123
124
125
126
127
128
129
130
131
132
package com.the_itach1.po;import javax.persistence.*;import java.util.ArrayList;import java.util.Date;import java.util.List;@Entity @Table(name = "t_user") public class User @Id @GeneratedValue private Long id; private String nickname; private String username; private String password; private String email; private String avatar; private Integer type; @Temporal(TemporalType.TIMESTAMP) private Date creatTime; @Temporal(TemporalType.TIMESTAMP) private Date updateTime; @OneToMany(mappedBy = "user") private List<Blog> blogs=new ArrayList<>(); public User () } public Long getId () return id; } public void setId (Long id) this .id = id; } public String getNickname () return nickname; } public void setNickname (String nickname) this .nickname = nickname; } public String getUsername () return username; } public void setUsername (String username) this .username = username; } public String getPassword () return password; } public void setPassword (String password) this .password = password; } public String getEmail () return email; } public void setEmail (String email) this .email = email; } public String getAvatar () return avatar; } public void setAvatar (String avatar) this .avatar = avatar; } public Integer getType () return type; } public void setType (Integer type) this .type = type; } public Date getCreatTime () return creatTime; } public void setCreatTime (Date creatTime) this .creatTime = creatTime; } public Date getUpdateTime () return updateTime; } public void setUpdateTime (Date updateTime) this .updateTime = updateTime; } public List<Blog> getBlogs () return blogs; } public void setBlogs (List<Blog> blogs) this .blogs = blogs; } @Override public String toString () return "User{" + "id=" + id + ", nickname='" + nickname + '\'' + ", username='" + username + '\'' + ", password='" + password + '\'' + ", email='" + email + '\'' + ", avatar='" + avatar + '\'' + ", type=" + type + ", creatTime=" + creatTime + ", updateTime=" + updateTime + '}' ; } }
Comment类,包含了子评论和父评论之间的关系
1
2
3
4
5
6
7
8
9
10
11
12
13
14
15
16
17
18
19
20
21
22
23
24
25
26
27
28
29
30
31
32
33
34
35
36
37
38
39
40
41
42
43
44
45
46
47
48
49
50
51
52
53
54
55
56
57
58
59
60
61
62
63
64
65
66
67
68
69
70
71
72
73
74
75
76
77
78
79
80
81
82
83
84
85
86
87
88
89
90
91
92
93
94
95
96
97
98
99
100
101
102
103
104
105
106
107
108
109
110
111
112
113
package com.the_itach1.po;import javax.persistence.*;import java.util.ArrayList;import java.util.Date;import java.util.List;@Entity @Table(name = "t_comment") public class Comment @Id @GeneratedValue private Long id; private String nickname; private String email; private String content; private String avatar; @Temporal(TemporalType.TIMESTAMP) private Date createTime; @ManyToOne private Blog blog; @OneToMany(mappedBy = "parentComment") private List<Comment> replyComments= new ArrayList<>();; @ManyToOne private Comment parentComment; public Comment () } public Long getId () return id; } public void setId (Long id) this .id = id; } public String getNickname () return nickname; } public void setNickname (String nickname) this .nickname = nickname; } public String getEmail () return email; } public void setEmail (String email) this .email = email; } public String getContent () return content; } public void setContent (String content) this .content = content; } public String getAvatar () return avatar; } public void setAvatar (String avatar) this .avatar = avatar; } public Date getCreateTime () return createTime; } public void setCreateTime (Date createTime) this .createTime = createTime; } public Blog getBlog () return blog; } public void setBlog (Blog blog) this .blog = blog; } @Override public String toString () return "Comment{" + "id=" + id + ", nickname='" + nickname + '\'' + ", email='" + email + '\'' + ", content='" + content + '\'' + ", avatar='" + avatar + '\'' + ", createTime=" + createTime + '}' ; } }
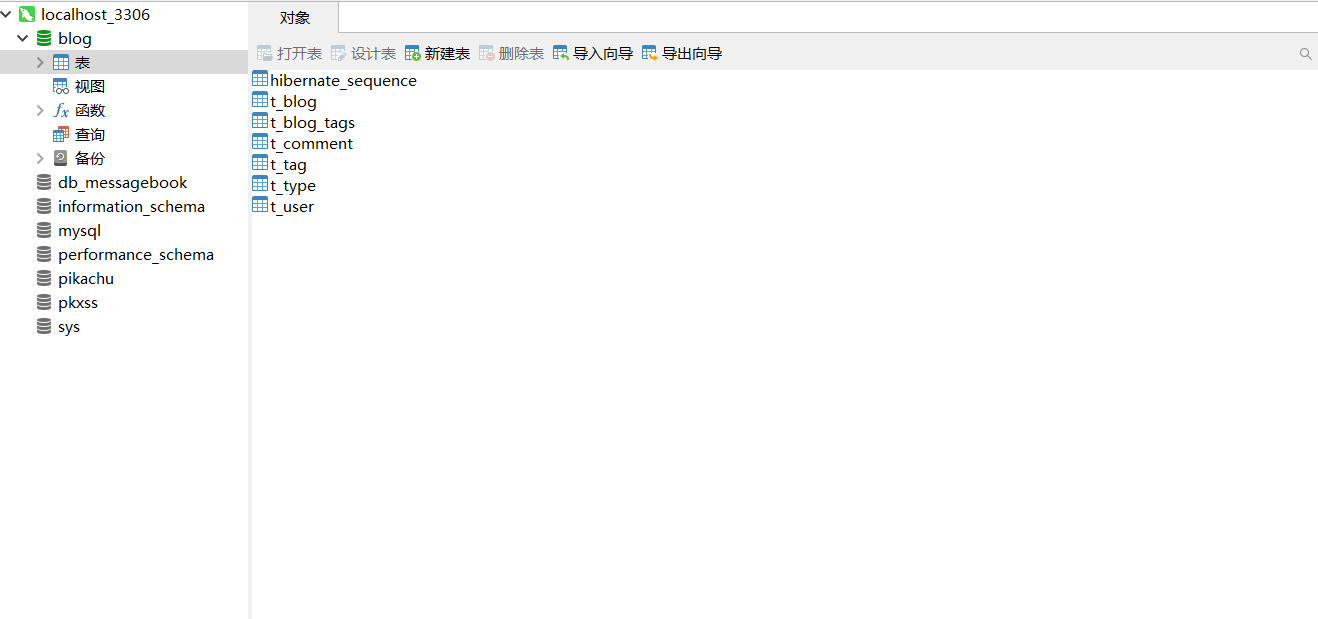
然后运行,就可以在数据库中看到生成的一些数据表了。
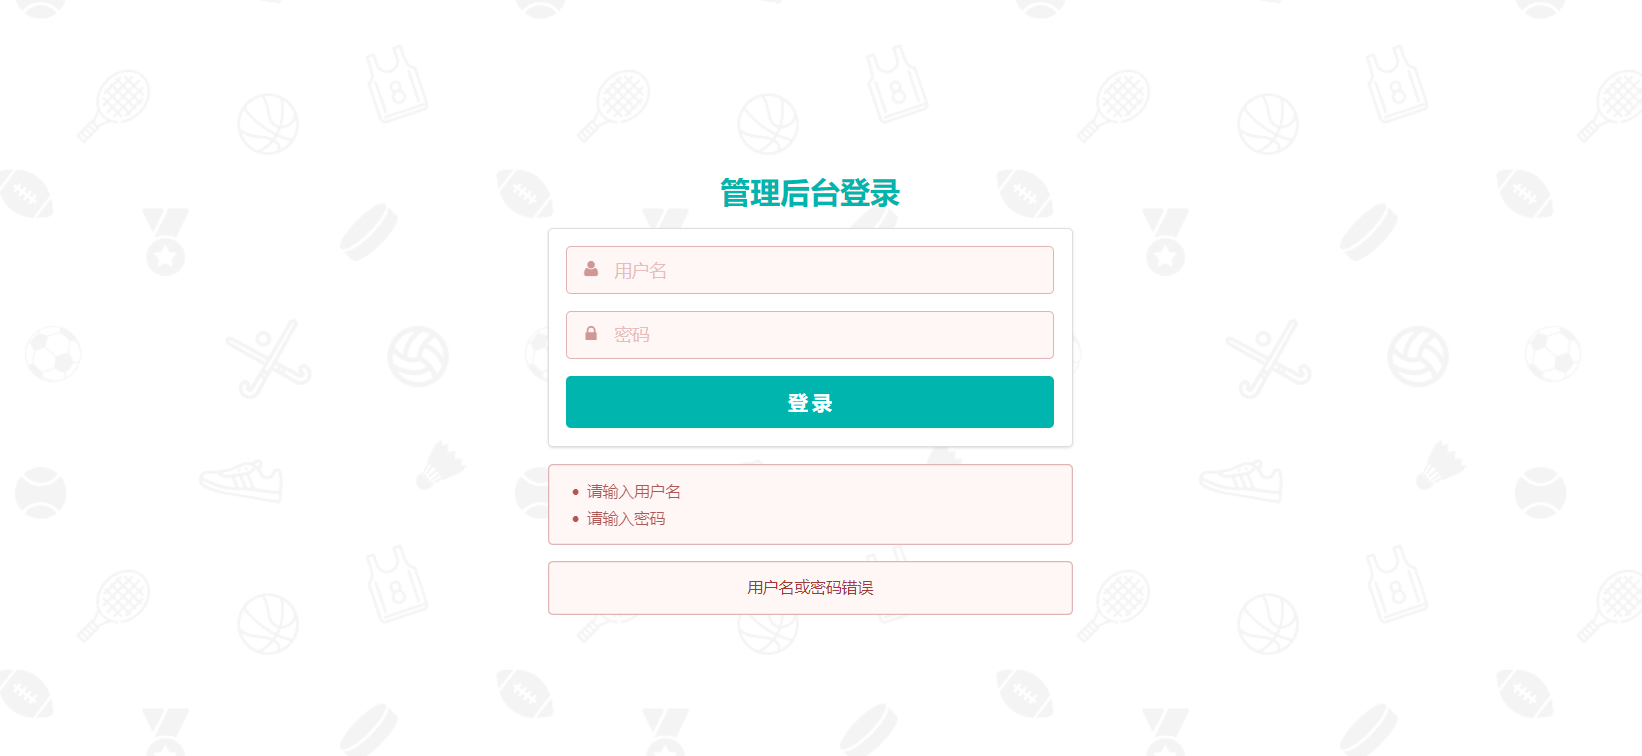
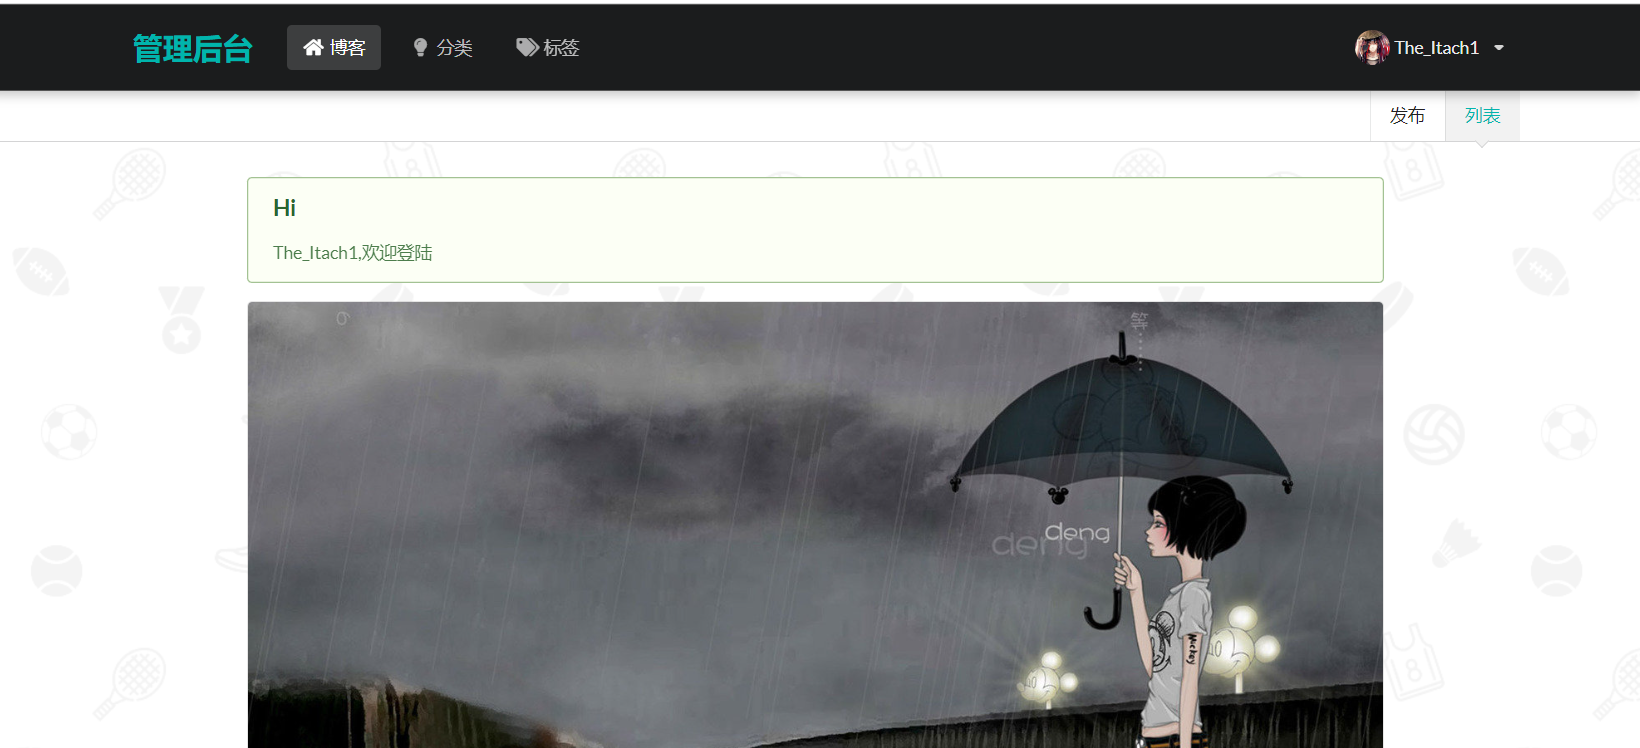
后台登录-1 还是先弄一些前端的东西,登录界面,后台index。
然后创建service软件包,创建UserService接口,定义一个checkUser(),用来验证用户登录。
1
2
3
4
5
6
7
8
9
package com.the_itach1.service;import com.the_itach1.po.User;public interface UserService User checkUser (String username,String password) ; }
然后创建UserServiceImpl去重载这个函数,接下来还会设计到从数据库中提取User的信息,所以需要用到jpa。
具体操作就是创建一个dao软件包,然后定义一个UserRepository接口,继承JpaRepository,然后定义个查询函数,就ok,具体如下。
1
2
3
4
5
6
7
8
9
10
package com.the_itach1.dao;import com.the_itach1.po.User;import org.springframework.data.jpa.repository.JpaRepository;public interface UserRepository extends JpaRepository <User ,Long > User findByUsernameAndPassword (String username,String password) ; }
创建个UserServiceImpl类,重写下checkUser函数,返回具体的user。
1
2
3
4
5
6
7
8
9
10
11
12
13
14
15
16
17
18
19
20
21
22
package com.the_itach1.service;import com.the_itach1.dao.UserRepository;import com.the_itach1.po.User;import org.springframework.beans.factory.annotation.Autowired;import org.springframework.stereotype.Service;@Service public class UserServiceImpl implements UserService @Autowired private UserRepository userRepository; @Override public User checkUser (String username,String password) { User user = userRepository.findByUsernameAndPassword(username,password); return user; } }
接下来编写登录的web控制器,先进入login.html,通过前端post传入的参数,然后采取不同的措施。
1
2
3
4
5
6
7
8
9
10
11
12
13
14
15
16
17
18
19
20
21
22
23
24
25
26
27
28
29
30
31
32
33
34
35
36
37
38
39
40
41
42
43
44
45
46
47
48
49
50
51
52
53
54
55
56
57
package com.the_itach1.web;import com.the_itach1.po.User;import com.the_itach1.service.UserService;import org.springframework.beans.factory.annotation.Autowired;import org.springframework.stereotype.Controller;import org.springframework.web.bind.annotation.GetMapping;import org.springframework.web.bind.annotation.PostMapping;import org.springframework.web.bind.annotation.RequestMapping;import org.springframework.web.bind.annotation.RequestParam;import org.springframework.web.servlet.mvc.support.RedirectAttributes;import javax.servlet.http.HttpSession;@Controller @RequestMapping("/admin") public class LoginControl @Autowired private UserService userService; @GetMapping public String loginPage () return "admin/login" ; } @PostMapping("login") public String login (@RequestParam String username, @RequestParam String password, HttpSession session, RedirectAttributes attributes) User user = userService.checkUser(username, password); if (user != null ) { session.setAttribute("user" , user); return "admin/index" ; } else { attributes.addFlashAttribute("message" ,"用户名或密码错误" ); return "redirect:/admin" ; } } @GetMapping("logout") public String logout (HttpSession session) { session.removeAttribute("user" ); return "redirect:/admin" ; } }
我的前端和视频中教的不太一样,可能由于我thymeleaf版本更高的原因,不需要对th这些做其他处理,直接在原html弄就行,所以我就没有像视频那样弄_fragments,也不知道后面是不是必须要这个东西,到时候在说。
我这里的html对应的两个传参是,直接就可以用。
<form class="ui large form" method="post" action="#" th:action="@{/admin/login}">

<a href="#" th:href="@{/admin/logout}" class="item">注销</a>
最后再填一段js验证用户名和密码是否为空。
1
2
3
4
5
6
7
8
9
10
11
12
13
14
15
16
17
18
19
20
21
<script> $('.ui.form' ).form({ fields : { username : { identifier: 'username' , rules: [{ type : 'empty' , prompt: '请输入用户名' }] }, password : { identifier: 'password' , rules: [{ type : 'empty' , prompt: '请输入密码' }] } } }); </script>
然后效果如下。
后台登录-2 这里主要是添加md5加密password,主要是为了一个安全性。
添加一个Md5加密的工具软件包,创建md5类,写一个md5加密的方法。
1
2
3
4
5
6
7
8
9
10
11
12
13
14
15
16
17
18
19
20
21
22
23
24
25
26
27
28
29
30
31
32
33
34
35
36
37
38
39
40
41
42
43
44
package com.the_itach1.util;import java.security.MessageDigest;import java.security.NoSuchAlgorithmException;public class Md5Util public static String code (String str) try { MessageDigest md = MessageDigest.getInstance("MD5" ); md.update(str.getBytes()); byte []byteDigest = md.digest(); int i; StringBuffer buf = new StringBuffer("" ); for (int offset = 0 ; offset < byteDigest.length; offset++) { i = byteDigest[offset]; if (i < 0 ) i += 256 ; if (i < 16 ) buf.append("0" ); buf.append(Integer.toHexString(i)); } return buf.toString(); } catch (NoSuchAlgorithmException e) { e.printStackTrace(); return null ; } } public static void main (String[] args) System.out.println(code("111111" )); } }
然后去修改checkUser这个方法。
User user = userRepository.findByUsernameAndPassword(username, Md5Util.code(password));接下来添加拦截器,目的就是防止没有权限的人,仍然可以根据已知路径访问到不能访问的资源界面等。
添加了一个BlogController类,用来测试,现在是无论怎么样都可以访问到admin/blogs.html。
用springboot内置interceptor的来做拦截器。
创建一个interceptor软件包,创建一个登陆拦截器类,LoginInterceptor,其实现就是重写了HandlerInterceptor的preHandle方法,作为一个网,达到拦截没处于登陆状态的用户。
1
2
3
4
5
6
7
8
9
10
11
12
13
14
15
16
17
18
19
20
21
22
23
24
package com.the_itach1.interceptor;import org.springframework.web.servlet.HandlerInterceptor;import javax.servlet.http.HttpServletRequest;import javax.servlet.http.HttpServletResponse;public class LoginInterceptor implements HandlerInterceptor @Override public boolean preHandle (HttpServletRequest request, HttpServletResponse response, Object handler) throws Exception if (request.getSession().getAttribute("user" )==null ) { response.sendRedirect("/admin" ); return false ; } return true ; } }
拦截器设置好了,肯定还需要配置下,访问那些url需要经过拦截器,那些又不需要通过拦截器,通俗讲就是,我们要将网安装在那些位置。
添加一个WebConfig,web控制器配置类,这个类可以拦截经过web控制器的所有请求,然后添加拦截器,原理是重写了WebMvcConfigurer的addInterceptors方法。
1
2
3
4
5
6
7
8
9
10
11
12
13
14
15
16
17
18
19
20
21
22
package com.the_itach1.interceptor;import org.springframework.context.annotation.Configuration;import org.springframework.web.servlet.config.annotation.InterceptorRegistry;import org.springframework.web.servlet.config.annotation.WebMvcConfigurer;@Configuration public class WebConfig implements WebMvcConfigurer @Override public void addInterceptors (InterceptorRegistry registry) registry.addInterceptor(new LoginInterceptor()) .addPathPatterns("/admin/**" ) .excludePathPatterns("/admin" ) .excludePathPatterns("/admin/login" ); } }
这时候,我们访问根目录/,是可以访问的,访问除了/admin和/admin/login这两个url,/admin下其他的路径,都会经过我们设置的拦截器。
分类管理-1 同样先创建好前端页面,这里我直接复制。
同样需要同数据库进行操作,涉及到增删查改等,所以还是像User类一样差不多的操作,创建接口,重写函数。
创建接口,TypeService
1
2
3
4
5
6
7
8
9
10
11
12
13
14
15
16
17
18
19
20
21
22
package com.the_itach1.service;import com.the_itach1.po.Type;import org.springframework.data.domain.Page;import org.springframework.data.domain.Pageable;public interface TypeService Type saveType (Type type) ; Type getType (Long id) ; Page<Type> listType (Pageable pageable) ; Type updateType (Long id,Type type) ; void deletType (Long id) }
创建接口TypeRepository,继承数据库交互JpaRepository。
重写函数,TypeServiceImpl
1
2
3
4
5
6
7
8
9
10
11
12
13
14
15
16
17
18
19
20
21
22
23
24
25
26
27
28
29
30
31
32
33
34
35
36
37
38
39
40
41
42
43
44
45
46
47
48
49
50
51
52
53
54
55
56
57
58
59
package com.the_itach1.service;import com.the_itach1.MyNotFoundException;import com.the_itach1.dao.TypeRepository;import com.the_itach1.po.Type;import org.springframework.beans.BeanUtils;import org.springframework.beans.factory.annotation.Autowired;import org.springframework.data.domain.Page;import org.springframework.data.domain.Pageable;import org.springframework.stereotype.Service;import javax.transaction.Transactional;@Service public class TypeServiceImpl implements TypeService @Autowired private TypeRepository typeRepository; @Transactional @Override public Type saveType (Type type) return typeRepository.save(type); } @Transactional @Override public Type getType (Long id) return typeRepository.findById(id).orElse(null ); } @Transactional @Override public Page<Type> listType (Pageable pageable) return typeRepository.findAll(pageable); } @Transactional @Override public Type updateType (Long id, Type type) Type t=typeRepository.findById(id).orElse(null ); if (t==null ) { throw new MyNotFoundException("不存在该类型" ); } BeanUtils.copyProperties(type,t); return typeRepository.save(t); } @Transactional @Override public void deletType (Long id) typeRepository.deleteById(id); } }
和数据库的交互就写完了,现在写Type对应的web控制器,这里还比较复杂,因为涉及到和前端的交互,然后我发现,教程中的_fragments.html实际上是一个全局的设置,防止我们重复性的对导航和底部进行编辑,然后这里我也不打算去使用了,因为实际上并不是很多,大不了,多改点。
这里存在一个问题,如果采用课程中的RESTful传参方法,会导致url路径改变,这样我们访问我们的一些css资源或者jpg就不行了,所以这里我采用传统的?get传参,并且修改了url,使其可读性跟好一点。
最好是和前端html一起理解,并且我简单修改了下其判空的条件。
1
2
3
4
5
6
7
8
9
10
11
12
13
14
15
16
17
18
19
20
21
22
23
24
25
26
27
28
29
30
31
32
33
34
35
36
37
38
39
40
41
42
43
44
45
46
47
48
49
50
51
52
53
54
55
56
57
58
59
60
61
62
63
64
65
66
67
68
69
70
71
72
73
74
75
76
77
78
79
80
81
82
83
84
85
86
87
88
89
90
91
92
93
94
95
96
97
98
99
100
101
102
103
104
105
106
107
108
package com.the_itach1.web.admin;import com.the_itach1.po.Type;import com.the_itach1.service.TypeService;import org.springframework.beans.factory.annotation.Autowired;import org.springframework.data.domain.Pageable;import org.springframework.data.domain.Sort;import org.springframework.data.web.PageableDefault;import org.springframework.stereotype.Controller;import org.springframework.ui.Model;import org.springframework.validation.BindingResult;import org.springframework.web.bind.annotation.*;import org.springframework.web.servlet.mvc.support.RedirectAttributes;@Controller @RequestMapping("/admin") public class TypeController @Autowired private TypeService typeService; @GetMapping("/types") public String types (@PageableDefault(size = 3,sort = {"id"},direction = Sort.Direction.DESC) Pageable pageable, Model model) model.addAttribute("page" ,typeService.listType(pageable)); return "admin/types" ; } @GetMapping("/types/input-add") public String addinput (Model model) model.addAttribute("type" , new Type()); return "admin/types-input" ; } @GetMapping("/types/edit") public String editInput (@RequestParam("id") Long id, Model model) model.addAttribute("type" , typeService.getType(id)); return "admin/types-input" ; } @GetMapping("/types/delete") public String delete (@RequestParam("id") Long id,RedirectAttributes attributes) typeService.deletType(id); attributes.addFlashAttribute("message" , "删除成功" ); return "redirect:/admin/types" ; } @PostMapping("/types") public String addpost (Type type, BindingResult result, RedirectAttributes attributes) Type type1 = typeService.getTypeByName(type.getName()); if (type1 != null ) { result.rejectValue("name" ,"nameError" ,"不能添加重复的分类" ); } if (type.getName().isEmpty()) { result.rejectValue("name" ,"nameError" ,"输入标签不能为空" ); } if (result.hasErrors()) { return "admin/types-input" ; } Type t = typeService.saveType(type); if (t == null ) { attributes.addFlashAttribute("message" , "新增失败" ); } else { attributes.addFlashAttribute("message" , "新增成功" ); } return "redirect:/admin/types" ; } @PostMapping("/types/{id}") public String editPost (Type type, BindingResult result,@PathVariable Long id ,RedirectAttributes attributes) Type type1 = typeService.getTypeByName(type.getName()); if (type1 != null ) { result.rejectValue("name" ,"nameError" ,"不能添加重复的分类" ); } if (type.getName().isEmpty()) { result.rejectValue("name" ,"nameError" ,"输入标签不能为空" ); } if (result.hasErrors()) { return "admin/types-input" ; } Type t = typeService.updateType(id,type); if (t == null ) { attributes.addFlashAttribute("message" , "更新失败" ); } else { attributes.addFlashAttribute("message" , "更新成功" ); } return "redirect:/admin/types" ; } }
标签管理 和类型管理是一样的,不多阐述。
博客列表管理 也差不多,区别是,多了一个多条件查询。
采用的方法是JpaSpecificationExecutor,具体操作如下。
1 2 3 4 5 6 7 8 9 10 11 12 13 14 15 16 17 18 19 20 21 22 23 24 25 26 27 28 29 30 31 @Override public Page<Blog> listBlog (Pageable pageable, Blog blog) return blogRepository.findAll(new Specification<Blog>() { @Override public Predicate toPredicate (Root<Blog> root, CriteriaQuery<?> query, CriteriaBuilder criteriaBuilder) List<Predicate> predicateList=new ArrayList<>(); if (!blog.getTitle().isEmpty() && blog.getTitle()!=null ) { predicateList.add(criteriaBuilder.like(root.<String>get("title" ),"%" +blog.getTitle()+"%" )); } if (blog.getType().getId()!=null ) { predicateList.add(criteriaBuilder.equal(root.<Type>get("type" ),blog.getType().getId())); } if (blog.isRecommend()) { predicateList.add(criteriaBuilder.equal(root.<Boolean>get("recommend" ),blog.isRecommend())); } query.where(predicateList.toArray(new Predicate[predicateList.size()])); return null ; } },pageable); }
然后同样构建web层,前端的具体细节还是没怎么看懂,主要是自己写肯定写不出来,不管了,知道怎么发送数据就完事了,这里还采用了局部变换,也就是search接口,只会改变下面的列表,不会修改搜索框中的内容。
由于blog.getType().getId(),会爆出指针为null的错误,所以新建一个BlogQuery,来传递title,TypeId,recommend进行数据库的查询。
1
2
3
4
5
6
7
8
9
10
11
12
13
14
15
16
17
18
19
20
21
22
23
24
25
26
27
28
29
30
31
32
33
34
35
36
37
38
39
40
41
42
43
44
45
46
47
package com.the_itach1.web.admin;import com.the_itach1.po.Blog;import com.the_itach1.service.BlogService;import com.the_itach1.service.TypeService;import com.the_itach1.vo.BlogQuery;import org.springframework.beans.factory.annotation.Autowired;import org.springframework.data.domain.Pageable;import org.springframework.data.domain.Sort;import org.springframework.data.web.PageableDefault;import org.springframework.stereotype.Controller;import org.springframework.ui.Model;import org.springframework.web.bind.annotation.GetMapping;import org.springframework.web.bind.annotation.PostMapping;import org.springframework.web.bind.annotation.RequestMapping;@Controller @RequestMapping("/admin") public class BlogController @Autowired private BlogService blogService; @Autowired private TypeService typeService; @GetMapping("/blogs") public String blogs (@PageableDefault(size = 2,sort = {"updateTime"},direction = Sort.Direction.DESC) Pageable pageable , BlogQuery blog, Model model) { model.addAttribute("types" ,typeService.listType()); model.addAttribute("page" ,blogService.listBlog(pageable,blog)); return "admin/blogs" ; } @PostMapping("/blogs/search") public String search (@PageableDefault(size = 2,sort = {"updateTime"},direction = Sort.Direction.DESC) Pageable pageable , BlogQuery blog, Model model) { model.addAttribute("page" ,blogService.listBlog(pageable,blog)); return "admin/blogs :: blogList" ; } }
博客新增 用markdown的格式新增博客,也就是增删查改了,这里大体和Type Tag类型差不多,只不过需要多传东西到前端,也就是传Type列表和Tag列表到前端,产生menu供我们选择。
然后需要注意的是,我们进行编辑的时候,由于tags有多个,而且我们要将原本的tags也显现出来,然后传给前端的是多个id,但是,这些id我们实际上并没有存到数据库,也就是说从数据库中拿出blog时这些id是没有的,所以我们在service层写了一个可以通过数据库中的tags获取到其所有id的方法,方便传到前端,然后进行展示。
web控制层
1
2
3
4
5
6
7
8
9
10
11
12
13
14
15
16
17
18
19
20
21
22
23
24
25
26
27
28
29
30
31
32
33
34
35
36
37
38
39
40
41
42
43
44
45
46
47
48
49
50
51
52
53
54
55
56
57
58
59
60
61
62
63
64
65
66
67
68
69
70
71
72
73
74
75
76
77
78
79
80
81
82
83
84
85
86
87
88
89
90
91
92
93
94
95
96
97
98
99
100
101
102
103
104
105
106
107
108
109
110
111
112
113
114
115
116
117
118
119
120
121
122
package com.the_itach1.web.admin; import com.the_itach1.po.Blog; import com.the_itach1.po.User; import com.the_itach1.service.BlogService; import com.the_itach1.service.TagService; import com.the_itach1.service.TypeService; import com.the_itach1.vo.BlogQuery; import org.springframework.beans.factory.annotation.Autowired; import org.springframework.data.domain.Pageable; import org.springframework.data.domain.Sort; import org.springframework.data.web.PageableDefault; import org.springframework.stereotype.Controller; import org.springframework.ui.Model; import org.springframework.web.bind.annotation.GetMapping; import org.springframework.web.bind.annotation.PostMapping; import org.springframework.web.bind.annotation.RequestMapping; import org.springframework.web.bind.annotation.RequestParam; import org.springframework.web.servlet.mvc.support.RedirectAttributes; import javax.servlet.http.HttpSession; @Controller @RequestMapping("/admin") public class BlogController { @Autowired private BlogService blogService; @Autowired private TypeService typeService; @Autowired private TagService tagService; @GetMapping("/blogs") public String blogs(@PageableDefault(size = 2,sort = {"updateTime"},direction = Sort.Direction.DESC) Pageable pageable , BlogQuery blog, Model model) { //将所有的Type传到前端,用menu菜单进行展示,传回来的是typeId。 model.addAttribute("types",typeService.listType()); //向前端展示所有的博客信息。 model.addAttribute("page",blogService.listBlog(pageable,blog)); return "admin/blogs"; } //Post传参发送搜索,并且只使前端的局部改变,向前端发送搜索后的博客。 @PostMapping("/blogs/search") public String search(@PageableDefault(size = 2,sort = {"updateTime"},direction = Sort.Direction.DESC) Pageable pageable , BlogQuery blog, Model model) { model.addAttribute("page",blogService.listBlog(pageable,blog)); return "admin/blogs :: blogList"; } //添加一个博客,转到添加博客界面 @GetMapping("/blogs/input-add") public String addinput(Model model) { //传一个空的blog对象,让前端进行编辑 model.addAttribute("blog",new Blog()); //将所有的Type传到前端,用menu菜单进行展示。 model.addAttribute("types",typeService.listType()); //将所有的Tag传到前端,用menu菜单进行展示。 model.addAttribute("tags",tagService.listTag()); return "admin/blogs-input"; } @GetMapping("/blogs/edit") public String editInput(@RequestParam("id") Long id, Model model) { Blog b; b=blogService.getBlog(id); //需要注意的是,我们想要展示原来的tags,但是由于tagIds变量并没有存到数据库,所以取出来时是没有赋值的,这里我们定义一个标签得到tagIds的方法。 b.inittagIds(); //根据get传参的id,来判断哪一个博客需要重新编辑。 model.addAttribute("blog", b); //将所有的Type传到前端,用menu菜单进行展示。 model.addAttribute("types",typeService.listType()); //将所有的Tag传到前端,用menu菜单进行展示。 model.addAttribute("tags",tagService.listTag()); return "admin/blogs-input"; } //根据id来删除某个博客 @GetMapping("/blogs/delete") public String delete(@RequestParam("id") Long id, RedirectAttributes attributes) { blogService.deleteBlog(id); attributes.addFlashAttribute("message", "删除成功"); return "redirect:/admin/blogs"; } //将编辑好的博客,添加或重新更新到数据库 @PostMapping("/blogs") public String post(RedirectAttributes attributes ,Blog blog, HttpSession session) { //给blog设置user对象,这篇博客是哪个user的 blog.setUser((User) session.getAttribute("user")); //给blog设置type blog.setType(typeService.getType(blog.getType().getId())); //给blog设置tags,需要注意的是有多个tags blog.setTags(tagService.listTag(blog.getTagIds())); Blog b; if (blog.getId() == null) { b = blogService.saveBlog(blog); } else { b = blogService.updateBlog(blog.getId(), blog); } if (b == null ) { attributes.addFlashAttribute("message", "操作失败"); } else { attributes.addFlashAttribute("message", "操作成功"); } return "redirect:/admin/blogs"; } }
这里更新时间和访问次数仿佛有点问题。需要对blog的service层进行修改。
1
2
3
4
5
6
7
8
9
10
11
12
13
14
15
16
17
18
19
20
21
22
23
24
25
26
27
@Transactional @Override public Blog saveBlog (Blog blog) if (blog.getId() == null ) { blog.setCreateTime(new Date()); blog.setUpdateTime(new Date()); blog.setViews(0 ); } else { blog.setUpdateTime(new Date()); } return blogRepository.save(blog); } @Transactional @Override public Blog updateBlog (Long id, Blog blog) Blog b = blogRepository.findOne(id); if (b == null ) { throw new NotFoundException("该博客不存在" ); } BeanUtils.copyProperties(blog,b, MyBeanUtils.getNullPropertyNames(blog)); b.setUpdateTime(new Date()); return blogRepository.save(b); }
博客首页展示 首页需要展示所有能发布的博客,按更新时间排序,然后就是排名前几的标签,类型栏,按从到小排序,然后还有按更新时间的推荐栏。
由于排序的要求不同,所以对数据库的查询方式也不同,具体实现去看对应的Service层和dao层。
index的web控制层。
1
2
3
4
5
6
7
8
9
10
11
12
13
14
15
16
17
18
19
20
21
22
23
24
25
26
27
28
29
30
31
32
33
34
35
36
37
38
39
40
41
42
43
44
45
46
47
48
49
package com.lrm.web;import com.lrm.NotFoundException;import com.lrm.service.BlogService;import com.lrm.service.TagService;import com.lrm.service.TypeService;import com.lrm.vo.BlogQuery;import org.springframework.beans.factory.annotation.Autowired;import org.springframework.data.domain.Pageable;import org.springframework.data.domain.Sort;import org.springframework.data.web.PageableDefault;import org.springframework.stereotype.Controller;import org.springframework.ui.Model;import org.springframework.web.bind.annotation.GetMapping;import org.springframework.web.bind.annotation.PathVariable;@Controller public class IndexController @Autowired private BlogService blogService; @Autowired private TypeService typeService; @Autowired private TagService tagService; @GetMapping("/") public String index (@PageableDefault(size = 8, sort = {"updateTime"}, direction = Sort.Direction.DESC) Pageable pageable, Model model) model.addAttribute("page" ,blogService.listBlog(pageable)); model.addAttribute("types" , typeService.listTypeTop(6 )); model.addAttribute("tags" , tagService.listTagTop(10 )); model.addAttribute("recommendBlogs" , blogService.listRecommendBlogTop(8 )); return "index" ; } @GetMapping("/blog/{id}") public String blog () return "blog" ; } }
全局搜索 进行全局搜索,给一个关键词,搜索出和这个词相关的所有文章,主要还时对于文章标题和文章内容的like模糊搜索。
具体实现就是
@Query("select b from Blog b where b.title like ?1 or b.content like ?1")
Page<Blog> findByQuery(String query,Pageable pageable);
然后就是相应的web控制器了。
1
2
3
4
5
6
7
8
@PostMapping("/search") public String search (@PageableDefault(size = 8, sort = {"updateTime"}, direction = Sort.Direction.DESC) Pageable pageable, @RequestParam String query, Model model) model.addAttribute("page" , blogService.listBlog("%" +query+"%" , pageable)); model.addAttribute("query" , query); return "search" ; }
具体展示某篇文章 这里处理的问题就是,如何将文章的内容从markdown格式转为正常html显示的模式,实际上已经有代码了,可以将其直接使用。
MarkdownUtils
1
2
3
4
5
6
7
8
9
10
11
12
13
14
15
16
17
18
19
20
21
22
23
24
25
26
27
28
29
30
31
32
33
34
35
36
37
38
39
40
41
42
43
44
45
46
47
48
49
50
51
52
53
54
55
56
57
58
59
60
61
62
63
64
65
66
67
68
69
70
71
72
73
74
75
76
77
78
79
80
81
82
83
84
85
86
package com.the_itach1.util;import org.commonmark.Extension;import org.commonmark.ext.gfm.tables.TableBlock;import org.commonmark.ext.gfm.tables.TablesExtension;import org.commonmark.ext.heading.anchor.HeadingAnchorExtension;import org.commonmark.node.Link;import org.commonmark.node.Node;import org.commonmark.parser.Parser;import org.commonmark.renderer.html.AttributeProvider;import org.commonmark.renderer.html.AttributeProviderContext;import org.commonmark.renderer.html.AttributeProviderFactory;import org.commonmark.renderer.html.HtmlRenderer;import java.util.*;public class MarkdownUtils public static String markdownToHtml (String markdown) Parser parser = Parser.builder().build(); Node document = parser.parse(markdown); HtmlRenderer renderer = HtmlRenderer.builder().build(); return renderer.render(document); } public static String markdownToHtmlExtensions (String markdown) Set<Extension> headingAnchorExtensions = Collections.singleton(HeadingAnchorExtension.create()); List<Extension> tableExtension = Arrays.asList(TablesExtension.create()); Parser parser = Parser.builder() .extensions(tableExtension) .build(); Node document = parser.parse(markdown); HtmlRenderer renderer = HtmlRenderer.builder() .extensions(headingAnchorExtensions) .extensions(tableExtension) .attributeProviderFactory(new AttributeProviderFactory() { public AttributeProvider create (AttributeProviderContext context) return new CustomAttributeProvider(); } }) .build(); return renderer.render(document); } static class CustomAttributeProvider implements AttributeProvider @Override public void setAttributes (Node node, String tagName, Map<String, String> attributes) if (node instanceof Link) { attributes.put("target" , "_blank" ); } if (node instanceof TableBlock) { attributes.put("class" , "ui celled table" ); } } } public static void main (String[] args) String table = "| hello | hi | 哈哈哈 |\n" + "| ----- | ---- | ----- |\n" + "| 斯维尔多 | 士大夫 | f啊 |\n" + "| 阿什顿发 | 非固定杆 | 撒阿什顿发 |\n" + "\n" ; String a = "[imCoding 爱编程](http://www.lirenmi.cn)" ; System.out.println(markdownToHtmlExtensions(a)); } }
当然这里需要在pom.xml中添加一些依赖。
    <dependency>
        <groupId>com.atlassian.commonmark</groupId>
        <artifactId>commonmark</artifactId>
        <version>0.10.0</version>
    </dependency>

    <dependency>
        <groupId>com.atlassian.commonmark</groupId>
        <artifactId>commonmark-ext-heading-anchor</artifactId>
        <version>0.10.0</version>
    </dependency>
    <dependency>
        <groupId>com.atlassian.commonmark</groupId>
        <artifactId>commonmark-ext-gfm-tables</artifactId>
        <version>0.10.0</version>
    </dependency>
接下来是具体处理,过程就是根据前端传出来的id然后去数据库获得博客信息,将文章内容进行转换,然后返回到web控制器,发送给前端。
1
2
3
4
5
6
7
8
9
10
11
12
13
14
15
@Override public Blog getAndConvert (Long id) Blog blog = blogRepository.findById(id).orElse(null ); if (blog == null ) { throw new MyNotFoundException("该博客不存在" ); } Blog b = new Blog(); BeanUtils.copyProperties(blog,b); String content = b.getContent(); b.setContent(MarkdownUtils.markdownToHtmlExtensions(content)); blogRepository.updateViews(id); return b; }
对应的web控制器。
1
2
3
4
5
6
@GetMapping("/blog/text") public String blog (@RequestParam("id") Long id,Model model) model.addAttribute("blog" , blogService.getAndConvert(id)); return "blog" ; }
然后就是对于views的处理,可以在service层单独写一个更新view的方法,但是更简便的方法还是直接在dao层自己写一个更新views的sql语句处理。
@Transactional
@Modifying
@Query("update Blog b set b.views = b.views+1 where b.id = ?1")
int updateViews(Long id);
Type归类 这个主要干的事情有两个。
得到一定的Type类型,和其对应的文章数目,展示在导航的下方。
点击某一Type,显示对应的文章。
第一个简单,博客首页展示的那个Type栏一样。
第二个,根据TypeId来查询对应的博客,实际上这个功能我们也已经在后台blog管理中实现过了。需要注意的点是,我们需要初始默认一个id展示,所以还需要遍历一下,直到找到一个数据库存在的id。
本来打算又修改下传参方式,防止一些资源找不到,结果发现能找到,就不改了,并且这里也不好改,因为前端还设计到了换页的问题,实际上也是一个比较麻烦的问题。
TypeShowController,调用的函数都是之前写过的。
1
2
3
4
5
6
7
8
9
10
11
12
13
14
15
16
17
18
19
20
21
22
23
24
25
26
27
28
29
30
31
32
33
34
35
36
37
38
39
40
41
42
43
44
45
46
47
48
49
50
51
52
53
package com.the_itach1.web;import com.the_itach1.po.Type;import com.the_itach1.service.BlogService;import com.the_itach1.service.TypeService;import com.the_itach1.vo.BlogQuery;import org.springframework.beans.factory.annotation.Autowired;import org.springframework.data.domain.Pageable;import org.springframework.data.domain.Sort;import org.springframework.data.web.PageableDefault;import org.springframework.stereotype.Controller;import org.springframework.ui.Model;import org.springframework.web.bind.annotation.GetMapping;import org.springframework.web.bind.annotation.PathVariable;import java.util.List;@Controller public class TypeShowController @Autowired private TypeService typeService; @Autowired private BlogService blogService; @GetMapping("/types/{id}") public String types (@PageableDefault(size = 2, sort = {"updateTime"}, direction = Sort.Direction.DESC) Pageable pageable, @PathVariable Long id, Model model) List<Type> types = typeService.listTypeTop(10000 ); if (id == -1 ) { id = types.get(0 ).getId(); } BlogQuery blogQuery = new BlogQuery(); blogQuery.setTypeId(id); model.addAttribute("types" , types); model.addAttribute("page" , blogService.listBlog(pageable, blogQuery)); model.addAttribute("activeTypeId" , id); return "types" ; } }
Tag归类 大题和Type归类差不多,之前Type是使用的多条件,这里我们就创建一个单条件的方法查询。
1
2
3
4
5
6
7
8
9
10
11
12
@Override public Page<Blog> listBlog (Long tagId, Pageable pageable) return blogRepository.findAll(new Specification<Blog>() { @Override public Predicate toPredicate (Root<Blog> root, CriteriaQuery<?> cq, CriteriaBuilder cb) Join join = root.join("tags" ); return cb.equal(join.get("id" ),tagId); } },pageable); }
然后其他的也没什么说的,和Type归类一样。
1
2
3
4
5
6
7
8
9
10
11
12
13
14
15
16
17
18
19
20
21
22
23
24
25
26
27
28
29
30
31
32
33
34
35
36
37
38
39
40
41
package com.the_itach1.web;import org.springframework.stereotype.Controller;import com.the_itach1.po.Tag;import com.the_itach1.service.BlogService;import com.the_itach1.service.TagService;import com.the_itach1.vo.BlogQuery;import org.springframework.beans.factory.annotation.Autowired;import org.springframework.data.domain.Pageable;import org.springframework.data.domain.Sort;import org.springframework.data.web.PageableDefault;import org.springframework.ui.Model;import org.springframework.web.bind.annotation.GetMapping;import org.springframework.web.bind.annotation.PathVariable;import java.util.List;@Controller public class TagShowController @Autowired private TagService tagService; @Autowired private BlogService blogService; @GetMapping("/tags/{id}") public String tags (@PageableDefault(size = 8, sort = {"updateTime"}, direction = Sort.Direction.DESC) Pageable pageable, @PathVariable Long id, Model model) List<Tag> tags = tagService.listTagTop(10000 ); if (id == -1 ) { id = tags.get(0 ).getId(); } model.addAttribute("tags" , tags); model.addAttribute("page" , blogService.listBlog(id,pageable)); model.addAttribute("activeTagId" , id); return "tags" ; } }
所有文章归档 关于页面 这个最简单,直接跳到自己写的about.html就行。

)